Josef “Jeff” Sipek

Raspberry Pi

Two weeks ago, I decided to do some hardware hacking. After a bit of reading up on embedded boards, I ended up buying a Raspberry Pi B+. It’s essentially a slightly smaller form factor version of the B, that has more GPIO pins and uses microSD cards instead of SD cards.

I hooked it up to the TV and played with Raspbian and RiscOS a little bit. As you may have guessed by now, that was not enough fun for me. I just had to boot a custom OS that talked over serial. :) This of course required some way to connect the Pi to something that can talk serial. But that’s a post for another day. :P This post is going to be about my impression of the Pi, as well as a cute little use I found for it over the past week.

Impressions

The Pi is a rather small board. The B+ is even smaller. A lot has been written about the technical side, so I won’t bother.

I was rather impressed with how much punch this little board packs. The hardest part about getting it going was putting it in the case (I got one of those kits because it was cheaper than buying everything separately). The built-in 4-port USB hub ended up quite useful. It allowed me to plug in both a keyboard and a mouse and have NOOBS installing Raspbian and RiscOS within minutes. A quick reboot later, I was at a shell prompt. That’s where the “new toy high” wore off a little. (I know I’ve talked about this with people before — it’s cool to be portable, but it’s also boring since the architecture becomes irrelevant.) I had a shell, and the most creative thing I could think of was to look at /proc/cpuinfo and /proc/meminfo.

I do have some thoughts about where the Pi B+ could have been better. The B version used an SD card. The B+ uses a microSD card. I consider this a bit of a regression. I have a bunch of older SD cards and an SD card reader that works well with SD cards. Sadly, this card reader (using a microSD adapter) fails to play nice with the SDXC modernization of SD that all microSD cards seem to use. I have the same issue with other microSD cards, so I’m pretty sure it’s the card reader. This makes updating a bit more of a pain.

The other thing I wish the Pi had is a DB9 RS232 connector. I have USB serial dongles that work well, but to talk serial to the Pi one needs to either get a level converter or a TTL serial to USB cable. I ended up getting a cheap USB cable with a fake Prolific chip inside. It works, but I hear Windows users are having a terrible time with evil drivers from Prolific.

Storm Timelapse

A little over a week after getting the Pi in the mail, we got a large storm heading our way. I got the brilliant idea to set up a webcam in an upstairs window. Previously, this would involve digging up an old computer, setting it up by the window, etc. This time, I reached for the Pi. I connected a webcam to one of the USB ports and a cheap WiFi USB adapter to another. A short config later, Raspbian was on the network even though there’s no network drop in sight.

I didn’t want to abuse the microSD card for storage of images, so I mounted an NFS share from the storage server in the basement. I had to use the nolock option to make the mount happen. I probably could have figured out why the lock manager was not running, but it was a temporary setup so a “quick hack” was all I did.

To capture images from the webcam, I ended up installing fswebcam, a small program that does one thing and does it well. I started up screen, and ran fswebcam with the following config.

device /dev/video0
input 0
loop 5
resolution 800x600
timestamp "%Y-%m-%d %H:%M:%S %Z"
jpeg 95
save /mnt/webcam/%Y%m%d/%H/0_%Y%m%d_%H%M%S.jpg
palette YUYV

Then, downstairs on my laptop, I mounted the same share and watched the files appear every five seconds. I ended up running the webcam for two days.

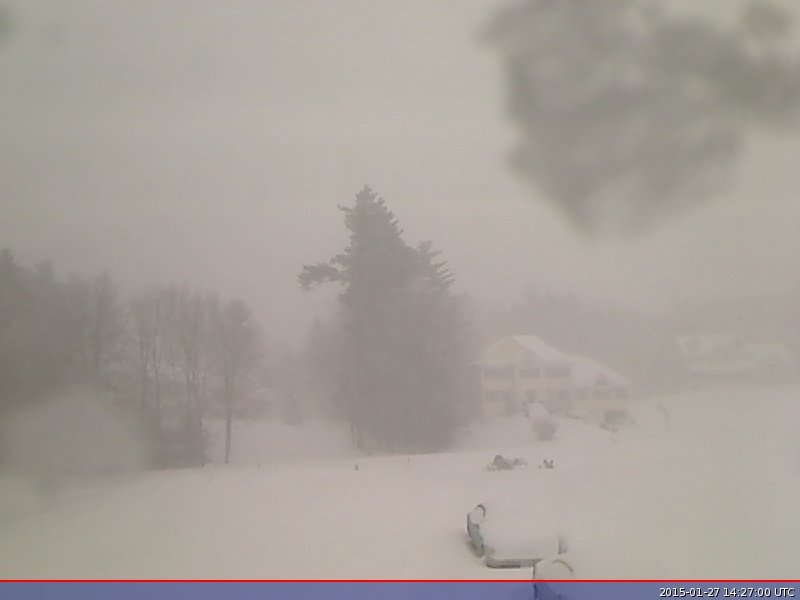
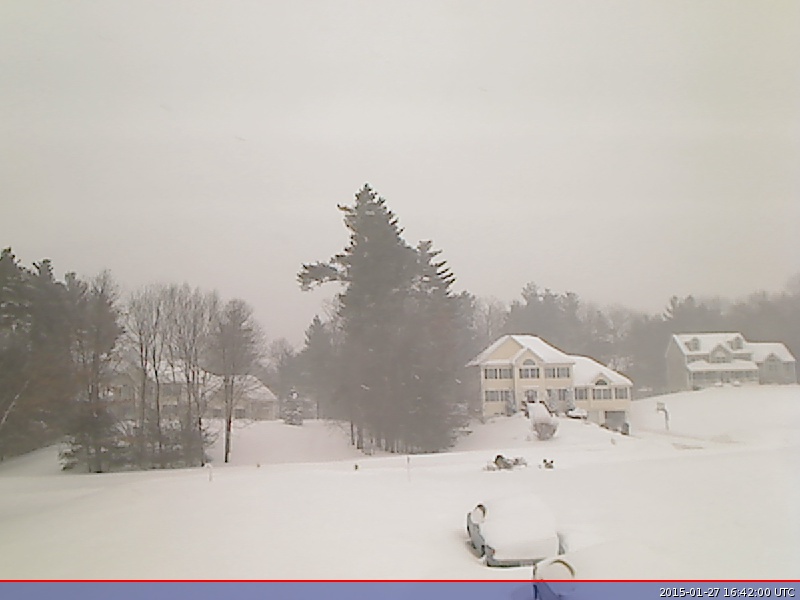
Here’s a couple of stills from the 27th:

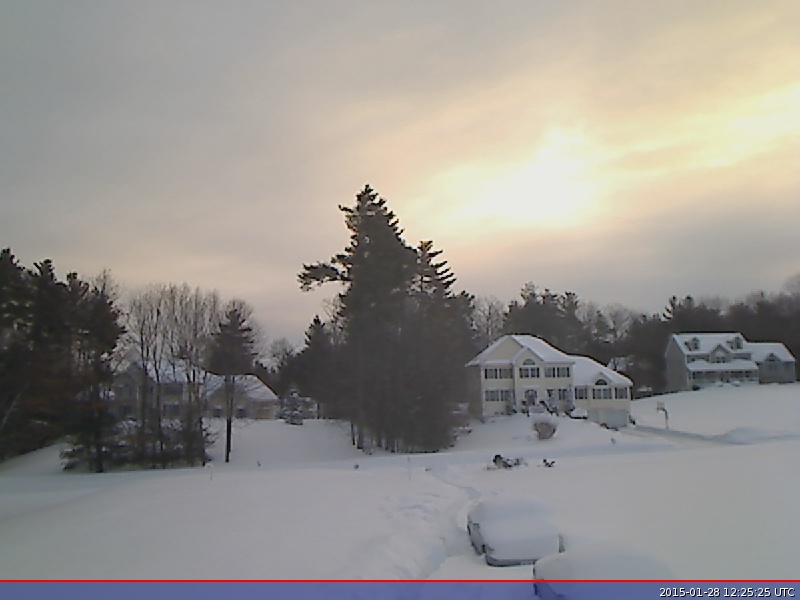
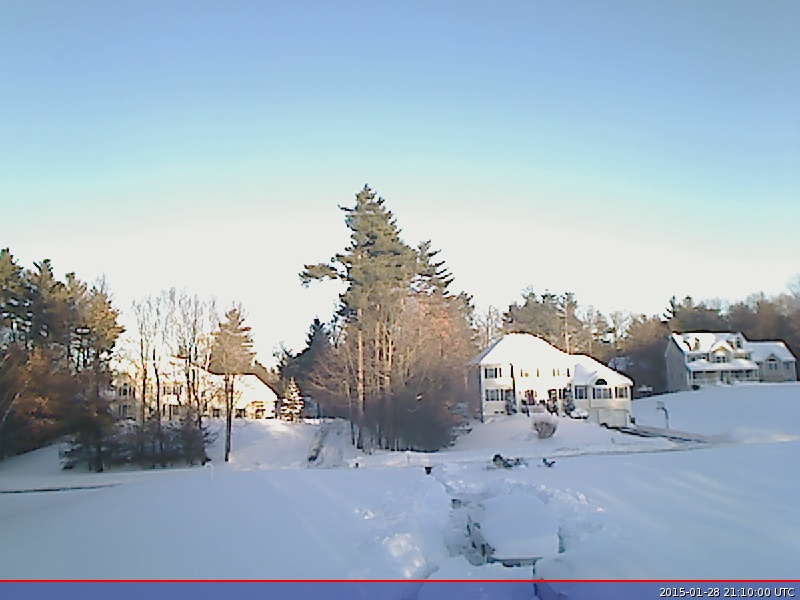
And here’s a couple from the 28th:

I did make a quick timelapse, but I haven’t tried to figure out a reasonable set of codec options to not end up with 300 MB of video. Maybe one day I’ll find a good set of options and upload the video here. Here’s what I used:

ffmpeg -framerate 30 -pattern_type glob -i '20150128/*/0_*.jpg' \
	-b:v 5000k -g 300 /tmp/out.mp4

Anyway, that’s it for today. I’ll write again about the Pi in the near future — from an OS developer’s perspective.

Debugging with mdb

Recently, Theo Schlossnagle posted two interesting articles about debugging on Illumos using mdb. They are MDB, CTF, DWARF, and other angelic things, and mdb custom dmods.

Inline Assembly & clang

Recently I talked about inline assembly with GCC and clang where I pointed out that LLVM seems to produce rather silly machine code. In a comment, a reader asked if this was LLVM’s IR doing this or if it was the machine code generator being silly. I was going to reply there, but the reply got long enough to deserve its own post.

I’ve dealt with LLVM’s IR for a couple of months during the fall of 2010. It was both interesting and quite painful.

The IR is at the Wikipedia article: single static assignment level. It assumes that stack space is cheap and infinite. Since it is a SSA form, it has no notion of registers. The optimization passes transform the IR quite a bit and at the end there is very little (if any!) useless code. In other words, I think it is the machine code generation that is responsible for the unnecessary stack frame push and pop. With that said, it is time to experiment.

Using the same test program as before, of course:

#define _KERNEL
#define _ASM_INLINES
#include <sys/atomic.h>

void test(uint32_t *x)
{
	atomic_inc_32(x);
}

Emitting LLVM IR

Let’s compile it with clang passing in the -emit-llvm option to have it generate test.ll file with the LLVM IR:

$ clang -S -emit-llvm -Wall -O2 -m64 test.c

There is a fair amount of “stuff” in the file, but the relevant portions are (line-wrapped by me):

; Function Attrs: nounwind
define void @test(i32* %x) #0 {
entry:
  tail call void asm sideeffect "lock; incl $0",
    "=*m,*m,~{dirflag},~{fpsr},~{flags}"(i32* %x, i32* %x) #1, !srcloc !1
  ret void
}

attributes #0 = { nounwind uwtable "less-precise-fpmad"="false"
  "no-frame-pointer-elim"="true" "no-frame-pointer-elim-non-leaf"
  "no-infs-fp-math"="false" "no-nans-fp-math"="false"
  "stack-protector-buffer-size"="8" "unsafe-fp-math"="false"
  "use-soft-float"="false" }

LLVM’s IR happens to be very short and to the point. The function prologue and epilogue are not expressed as part of IR blob that gets passed to the machine code generator. Note the function attribute no-frame-pointer-elim being true (meaning frame pointer elimination will not happen).

Now, let’s add in the -fomit-frame-pointer option.

$ clang -S -emit-llvm -Wall -O2 -m64 -fomit-frame-pointer test.c

Now, the relevant IR pieces are:

; Function Attrs: nounwind
define void @test(i32* %x) #0 {
entry:
  tail call void asm sideeffect "lock; incl $0",
    "=*m,*m,~{dirflag},~{fpsr},~{flags}"(i32* %x, i32* %x) #1, !srcloc !1
  ret void
}

attributes #0 = { nounwind uwtable "less-precise-fpmad"="false"
  "no-frame-pointer-elim"="false" "no-infs-fp-math"="false"
  "no-nans-fp-math"="false" "stack-protector-buffer-size"="8"
  "unsafe-fp-math"="false" "use-soft-float"="false" }

The no-frame-pointer-elim attribute changed (from true to false), but the IR of the function itself did not change. (The no-frame-pointer-elim-non-leaf attribute disappeared as well, but it really makes sense since -fomit-frame-pointer is a rather large hammer that just forces frame pointer elimination everywhere and so it doesn’t make sense to differentiate between leaf and non-leaf functions.)

So, to answer Steve’s question, the LLVM IR does not include the function prologue and epilogue. This actually makes a lot of sense given that the IR is architecture independent and the exact details of what the prologue has to do are define by the ABIs.

IR to Assembly

We can of course use llc to convert the IR into real 64-bit x86 assembly code.

$ llc --march=x86-64 test.ll
$ gas -o test.o --64 test.s

Here is the disassembly for clang invocation without -fomit-frame-pointer:

test()
    test:     55                 pushq  %rbp
    test+0x1: 48 89 e5           movq   %rsp,%rbp
    test+0x4: f0 ff 07           lock incl (%rdi)
    test+0x7: 5d                 popq   %rbp
    test+0x8: c3                 ret    

And here is the disassembly for clang invocation with -fomit-frame-pointer:

test()
    test:     f0 ff 07           lock incl (%rdi)
    test+0x3: c3                 ret    

Conclusion

So, it turns out that my previous post simply stumbled across the fact that GCC and clang have different set of optimizations for -O2. GCC includes -fomit-frame-pointer by default, while clang does not.

Working with Wide Characters

Two weekends ago, I happened to stumble into a situation where I had a use for wide characters. Since I’ve never dealt with them before, it was an interesting experience. I’m hoping to document some of my thoughts and discoveries in this post.

As you may have guessed, I am using OpenIndiana for development so excuse me if I happen to stray from straight up POSIX in favor of Illumos-flavored POSIX.

The program I was working with happens to read a bunch of strings. It then does some mangling on these strings — specifically, it (1) converts these strings between Unicode and EBCDIC, and (2) at times it needs to uppercase a Unicode character. (Yes, technically the Unicode to EBCDIC conversion is lossy since EBCDIC doesn’t have all possible Unicode characters. Practically, the program only cares about a subset of Unicode characters and those all appear in EBCDIC.)

In the past, most of the code I wrote dealt with Unicode by just assuming the world was ASCII. This approach allows UTF-8 to just work in most cases. Assuming you don’t want to mangle the strings in any major way, you’ll be just fine. Concatenation (strcat), ASCII character search (strchr), and substring search (strstr) all work perfectly fine. While other functions will do the wrong thing (e.g., strlen will return number of bytes, not number of characters).

Converting an ASCII string to EBCDIC is pretty easy. For each input character (aka. each input byte), do a lookup in a 256-element array. The output is just a concatenation of all the looked up values.

This simple approach falls apart if the input is UTF-8. There, some characters (e.g., ö) take up multiple bytes (e.g., c3 b6). Iterating over the input bytes won’t work. One way to deal with this is to process as many bytes as necessary to get a full character (1 for ASCII characters, 2–6 for “non-ASCII” Unicode characters), and then covert/uppercase/whatever it instead of the raw bytes. This sort of hoop-jumping is necessary whenever one wants to process characters instead of bytes.

wchar_t

Another way to deal with this is to store the string as something other than UTF-8. I took this approach. When the program reads in a (UTF-8) string, it promptly converts it into a wide character string. In other words, instead of my strings being char *, they are wchar_t *. On my system, wchar_t is a 32-bit unsigned integer. This trivially makes all Unicode characters the same length — 32 bits. I can go back to assuming that one element of my string corresponds to a single character. I just need to keep in mind that a single character is not one byte. In practice, this means remembering to malloc more memory than before. In other words:

wchar_t *a, *b;

a = malloc(MAX_LEN);                   /* WRONG */
b = malloc(sizeof(wchar_t) * MAX_LEN); /* CORRECT */

Uppercasing a character becomes just as easy as it was with plain ol’ ASCII. For example, to uppercase the ith letter in a string:

void uppercase_nth(wchar_t *str, int i)
{
	str[i] = toupper(str[i]);
}

There are however some downsides. First and foremost, if you are dealing mostly with ASCII, then your memory footprint may have just quadrupled. (In my case, the program is so small that I don’t care about the memory footprint increase.) Second, you have to deal with a couple of “silly” syntax to make the (C99) compiler realize what it is you are attempting to do.

const wchar_t *msg = L"Lorem ipsum";
const wchar_t *letter = L'x';

“str” functions

Arguably, the most visible change involves the “str” functions. With plain old ASCII strings, you use functions like strlen, strcpy, and strcat to, respectively, get the length, copy a string, and concatenate two strings. These functions assume that each byte is a character and that the string is terminated by a null (8-bit 0) so they do not work in the world of wide characters. (Keep in mind that since ASCII consists of characters with values less than 128, a 32-bit integer with that value will have three null bytes in most characters (assuming ASCII text). On big endian systems, you’ll end up with the empty string, while on little endian systems you’ll end up with a string consisting of just the first character.) Thankfully, there are alternatives to the “str” functions that know how to deal with wide character strings — the “ws” functions. Instead of using strlen, strcpy, and strcat, you want to call wslen, wscpy, and wscat. There are of course more. On Illumos, you can look at the wcstring(3c) manpage for many (but not all!) of them.

printf & friends

Manipulating strings solely with the “str” functions is tedious. Often enough, it is so much simpler to reach for the venerable printf. This is where things get really interesting. The printf family of functions knows how to convert between char * strings and wchar_t * strings. First of all, let’s take a look at snprintf (the same applies to printf and sprintf). Here’s a simple code snippet that dumps a string into a char array. The output is char *, the format string is char *, and the string input is also char *.

char output[1024];
char *s = "abc";

snprintf(output, sizeof(output), "foo %s bar\n", s);

One can use %ls to let snprintf know that the corresponding input string is a wide character string. snprintf will do everything the same, except it transparently converts the wide character string into a regular string before outputting it. For example:

char output[1024];
wchar_t *s = L"abc";

snprintf(output, sizeof(output), "foo %ls bar\n", s);

Will produce the same output as the previous code snippet.

Now, what if you want the output to be a wide character string? Simple, use the wprintf functions! There are fwprintf, wprintf, and swprintf which correspond to fprintf, printf, and snprintf. Do note that the wide-character versions want the format string to be a wide character string. As far as the format string is concerned, the same rules apply as before — %s for char * input and %ls for wchar_t * input:

wchar_t output[1024];
wchar_t *s1 = L"abc";
char *s2 = "abc";

swprintf(output, sizeof(output), L"foo %ls %s bar\n", s1, s2);

Caution! In addition to swprintf there is also wsprintf. This one takes the format string in char * but outputs into a wchar_t * buffer.

Here’s the same information, in a tabular form. The input string type is always determined by the format string contents — %s for char * input and %ls for wchar_t * input:

Function Output Format string
printf, sprintf, snprintf, fprintf char * char *
wprintf, swprintf, fwprintf wchar_t * wchar_t *
wsprintf wchar_t * char *

setlocale and Summary

Oh, I almost forgot! You should call setlocale before you start using all these features.

So, to conclude, it is pretty easy to use wide character strings.

  • #include <wchar.h>
  • #include <widec.h>
  • call setlocale in your main
  • use wchar_t instead of char
  • use %ls in format strings instead of %s
  • use L string literal prefix
  • beware of wsprintf and swprintf

I wouldn’t want to deal with this sort of code on daily basis, but for a random side project it isn’t so bad. I do like the ability to not worry about the encoding — the 1:1 mapping of characters to array elements is really convenient.

Delegating mount/umount Privileges

Recently, I was doing some file system changes. Obviously, I wanted to run them as an unprivileged user. Unfortunately, the test involved mounting and unmounting a filesystem (tmpfs to be specific). At first I was going to set up a sudo rule to allow mount and umount to run without asking for a password. Then I remembered that I should be able to give the unprivileged user the additional privileges. It turns out that there is only one privilege (sys_mount) necessary to delegate…and it is easy to do!

$ usermod -K defaultpriv=basic,sys_mount jeffpc

Then it’s a matter of logging out and back in. We can check using ppriv:

$ ppriv $$
925:    bash
flags = <none>
        E: basic,sys_mount
        I: basic,sys_mount
        P: basic,sys_mount
        L: all

At this point, mounting and unmounting works without sudo or similar user switching:

$ mkdir tmp
$ mount -F tmpfs none /tmp/tmp
$ df -h /tmp/tmp
Filesystem      Size  Used Avail Use% Mounted on
swap            2.6G     0  2.6G   0% /tmp/tmp

Powered by blahgd