Josef “Jeff” Sipek

Septemberfest 2016 - Birds of Prey

This past weekend, the Dunstable Rural Land Trust had its annual Septemberfest event (yes, it ended up being in early October this year). Holly and I went to it armed with the cameras hoping to get some nice images of birds from the “Birds of Prey” program. We were not disappointed.

So far, I have managed to sift through only the bird photos. I still have to go through the other ones (e.g., the colorful autumn shots) and figure out which are the keepers. I set up a gallery which I’ll update with the non-bird photos in the near future.

Without further ado, here are the birds!

The peregrine falcon:

The screech owl:

The great horned owl:

The Harris’s hawk:

The red-tailed hawk:

The American kestrel:

The golden eagle:

This is only a fraction of the photos that are in the gallery, so make sure to check it out for more avian goodness.

First Attempt at Food Photography

Yesterday evening, I decided that making dinner and photography should be combined more often. As a result, I dragged my camera, the 70-200mm zoom, the flash, and the tripod to the kitchen to try my hand at taking some photos of scrambled eggs—or to be more specific, scrambled eggs as they were cooking.

The fully extended tripod left the Arca-Swiss plate about nose-level. With the D750 with the 70-200mm on top, the LCD on the camera was just above my head. The swiveling LCD on the camera was rather useful and made it significantly easier to review test shots, and mess with the flash output.

As far as the food itself is concerned, I prepared two bowls—one with five cracked eggs, and the other with some shredded ham slices and swiss cheese slices.

Here is a (terrible) diagram showing the setup from above to better explain it.

The four-circle thing in the middle is the stove, with the skillet on the bottom right burner (the scribble with a handle sticking out). The camera on the tripod is in the bottom right corner of the diagram. To the left of the stove is the flash. It’s on top of a cardboard box that the 70-200mm came in. Above the stove is a stove hood with a couple of lights pointing down at the stove top.

I used a wooden spatula in the otherwise empty skillet to have something to focus on. After I got the focus right where I expected the food to be, I switched to manual focus. In the process of taking those test shots, I ended up concluding that I need both the flash and the stove hood and kitchen lights to get something resembling the right kind of lighting. Of course the kitchen light color temperature did not match the flash, so I grabbed the orange gel and put it on the flash. (This is the first time I used a gel on a flash!) It worked.

It was time to start cooking! Once the bacon grease on the skillet got hot enough, I poured the eggs in, and quickly moved to the camera to get some more test shots—to make sure that the exposure, focus, and composition were good. I ended up tweaking the focus and flash output.

After I scrambled the eggs a little, I dumped the ham and cheese on top and moved it around a bit to avoid a large mountain of ham and cheese. Then it was time to go back to the camera—to get the final shots.

Even though I was zoomed in near 200 mm, I ended up cropping significantly to get the shot I wanted. I suppose this would have been a good time to use a macro lens (which I do not have).

I set up a gallery for my food photography, but so far the only image there is the one above. Obviously, this means that I have to take more food photos. :)

Sunset over Mount Monadnock

Back at the end of June, I hiked up the nearby Gibbet Hill in Wikipedia article: Groton to watch the sunset and get some nice shots of the western sky. (gallery)

Both times I went, I arrived about 20 minutes before the sunset, and got situated. Once the actual sunset started happening, it was a matter of a minute or two before the sun was gone.

Just before sunset @ 24mm:

Sunset @ 70mm:

The peak that the sun sat behind is Wikipedia article: Mount Monadnock—about 50 km from Groton.

I took a couple of panorama shots. I like this one the best (6 shots):

While hiking up the hill, I spotted this tree against the colorful sky. I had to get a silhouette:

I was surprised at how little time the entire trip took. From leaving the house to getting back, it was about 70 minutes. This is certainly a quick photo shoot compared to the day-long trips like the one to Boston in early June ([1,2,3]).

Stellafane (2016)

Last weekend we drove to Wikipedia article: Springfield, VT to attend the Stellafane Convention. In short, it’s two and a half days of camping, astronomy and telescope making talks, and of course observing. I brought my camera (D750), two lenses (24-70mm f/2.8 and 70-200mm f/2.8), and a tripod. Over the two and a half days, I ended up taking 400 shots of just about everything of some interest. I post processed about 60 and created a gallery. I’m going to include only some in this post, so make sure to check out the gallery for more shots that just didn’t fit the narrative here.

Thursday

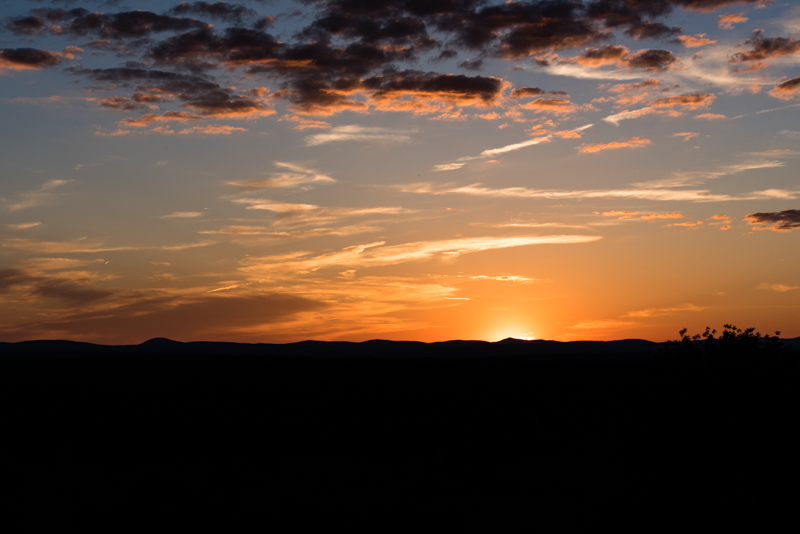
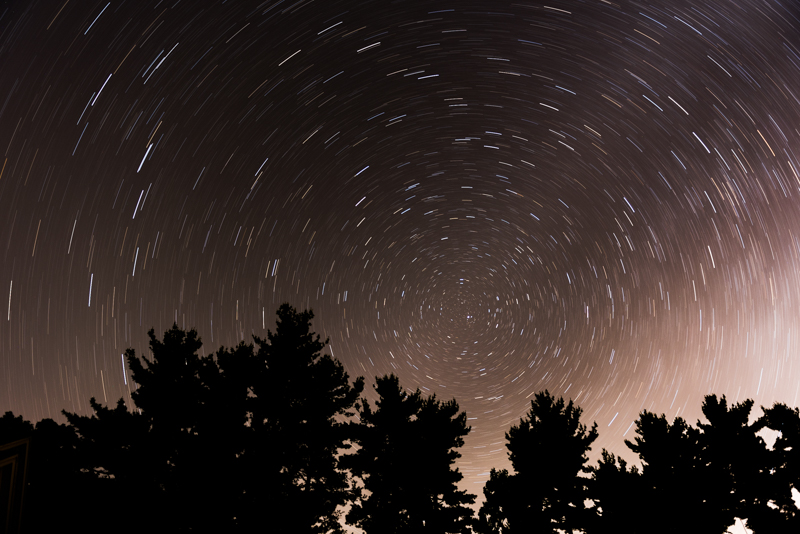
Thursday was mainly about arriving in the late afternoon, setting up the tent, and doing some observing once it got dark. Photography-wise, my primary goal for Thursday was to get some sky images at 24mm. I tried some long exposure (657 seconds) to get some star trails:

There was a decent number of people walking around with red lights (so as not to destroy night vision), so a number of my shots ended up with some red light trails near the ground. (That’s that wobbly red line.)

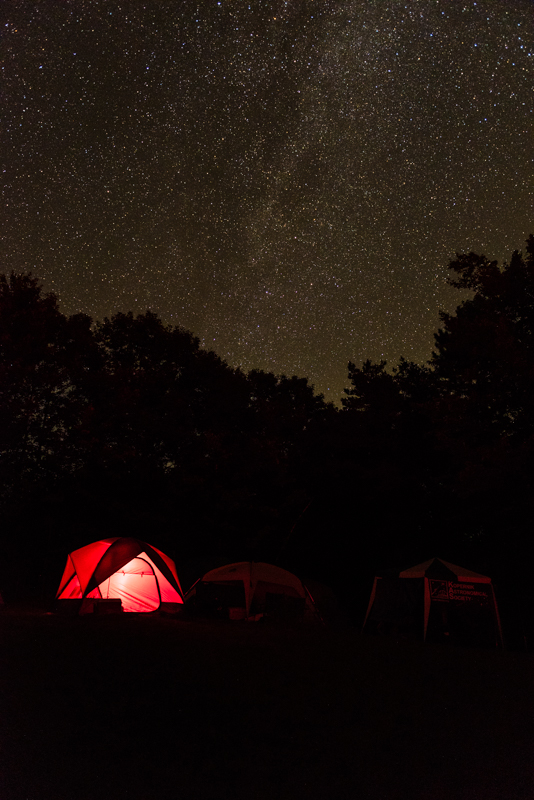
I also took a decent amount of short exposures (10-16 seconds). At 24mm on the D750, 13 seconds seems to be just about when stars start to turn into trails.

This is the only staged shot—I intentionally left one of our red flashlights on in the tent to provide something interesting in the foreground.

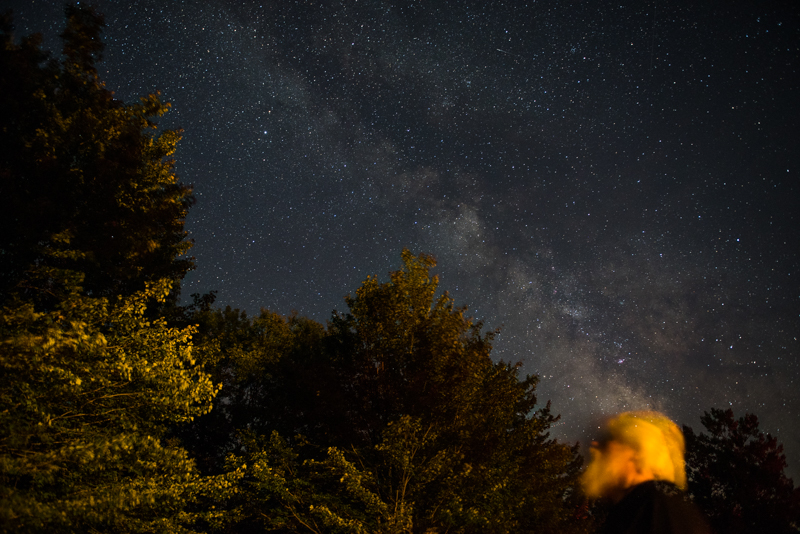
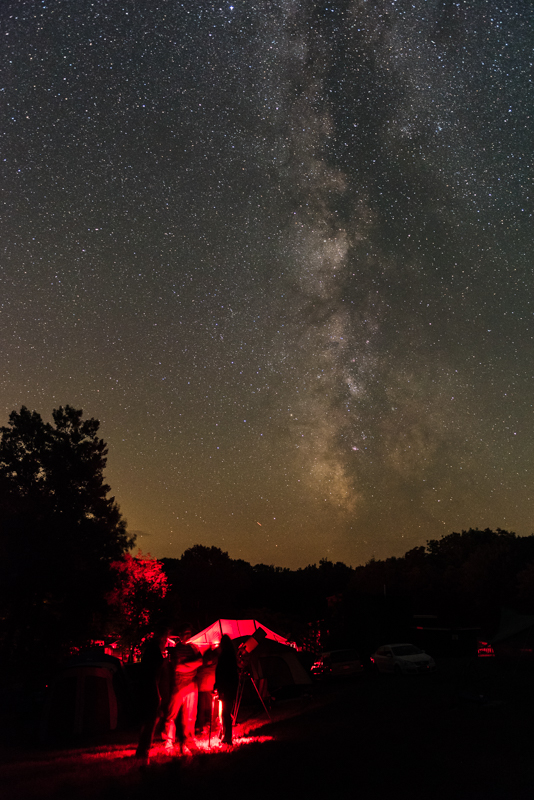
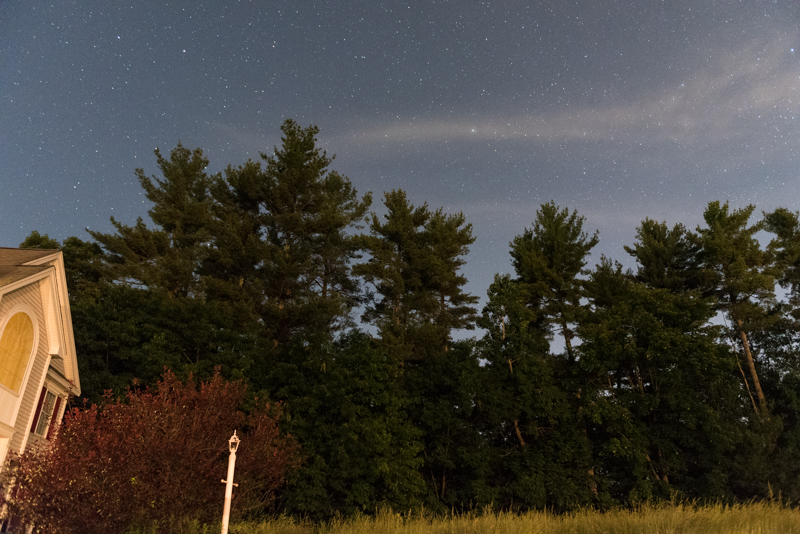
Here is our tent-neighbor and friend looking up at the sky. He didn’t actually know that I was taking a shot of the milky way, and I didn’t realize that he managed to sneak into the frame. The trees got lit up by some joker driving around with headlights on. I expected that to ruin the shot, but it actually worked out pretty well.

Friday

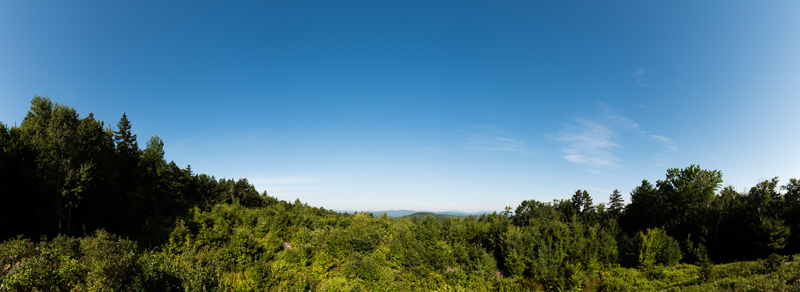
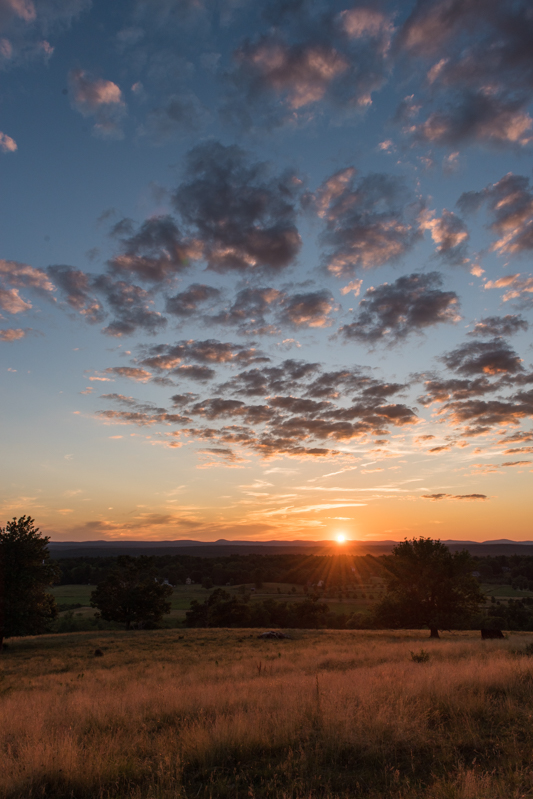
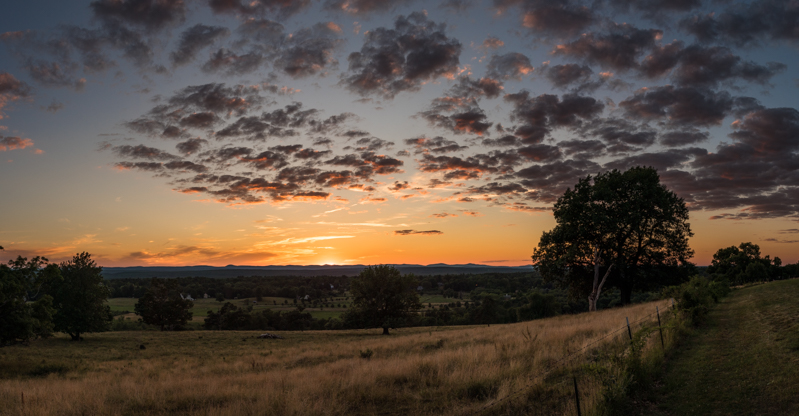
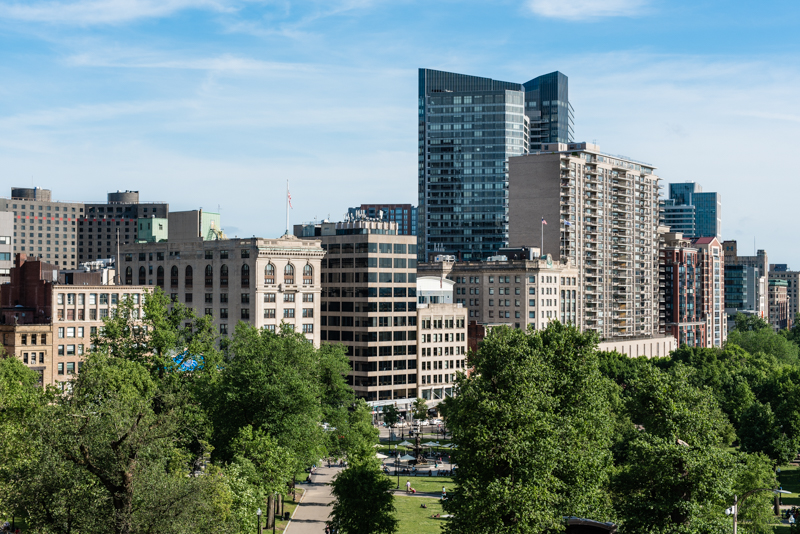
Friday is the first full day. I started it by hiking to the other side of the site, which not only sports a nice view, but also nonzero phone and data coverage:

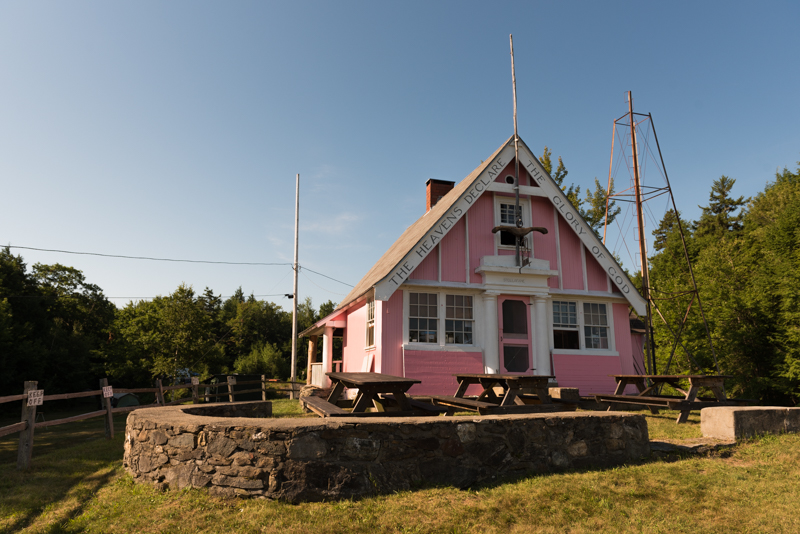
The original club house is there as well in all its pink glory:

The last, but not least, building there is the turret solar telescope:

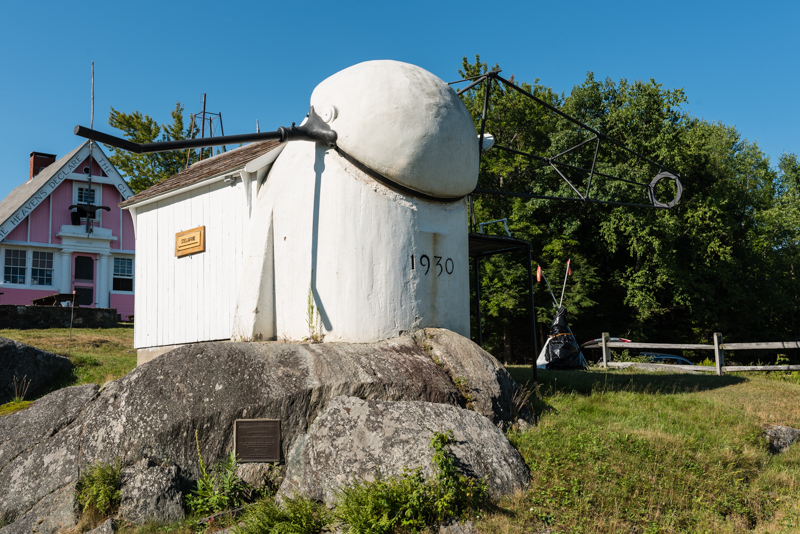
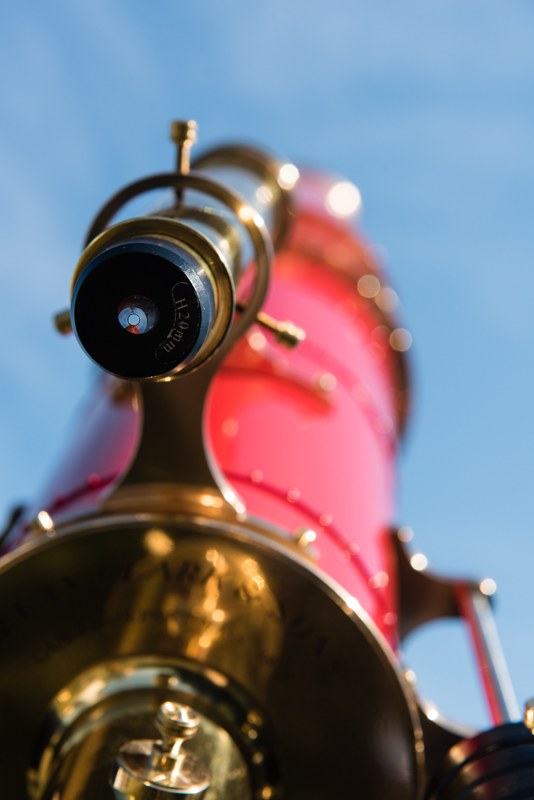
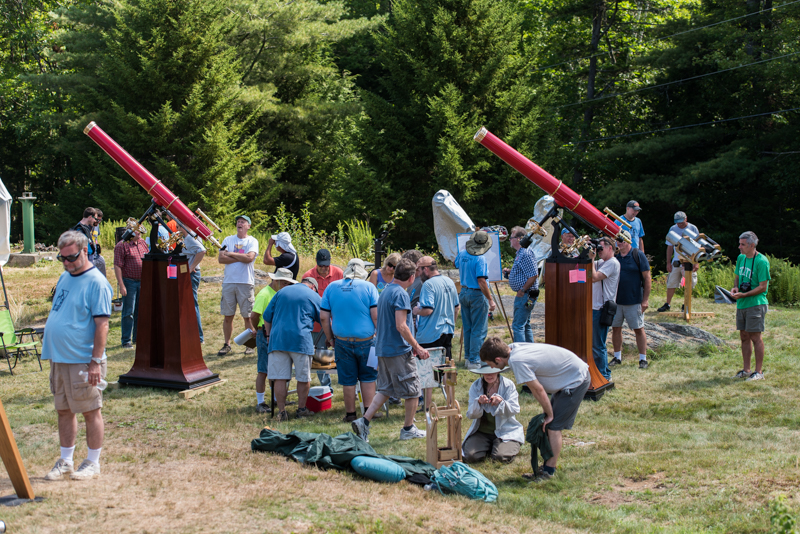
Right next to it is the location of the amateur telescope contest. Yes, people build their own telescopes and enter them into a competition to see whose is the best. This year, the most eye grabbing (in my opinion) was a pair of scaled down reconstructions of the 8-inch Alvan Clark refractor. Here’s one of them:

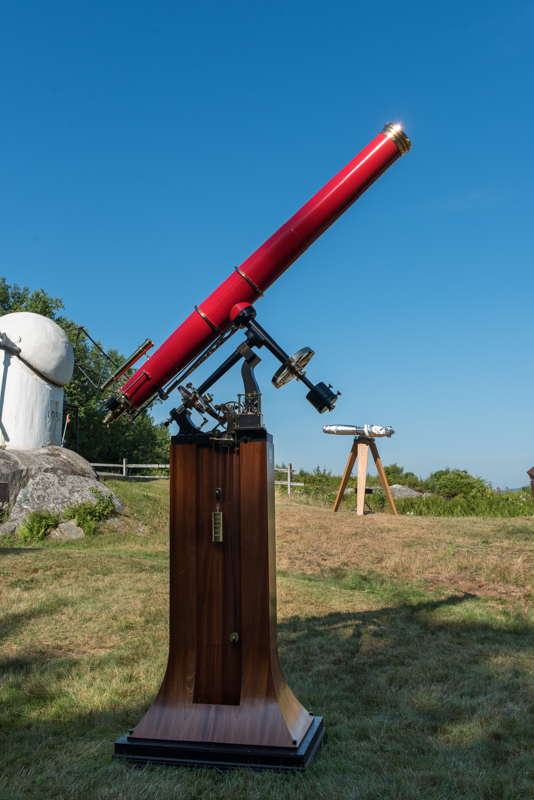
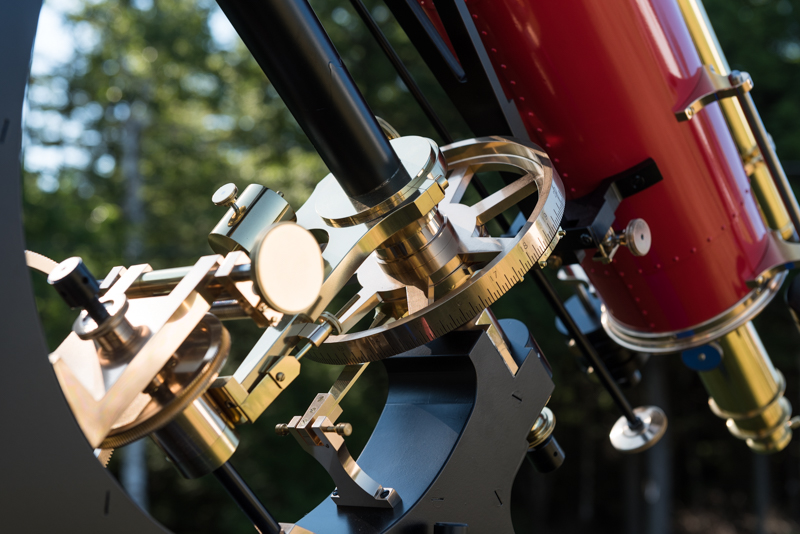
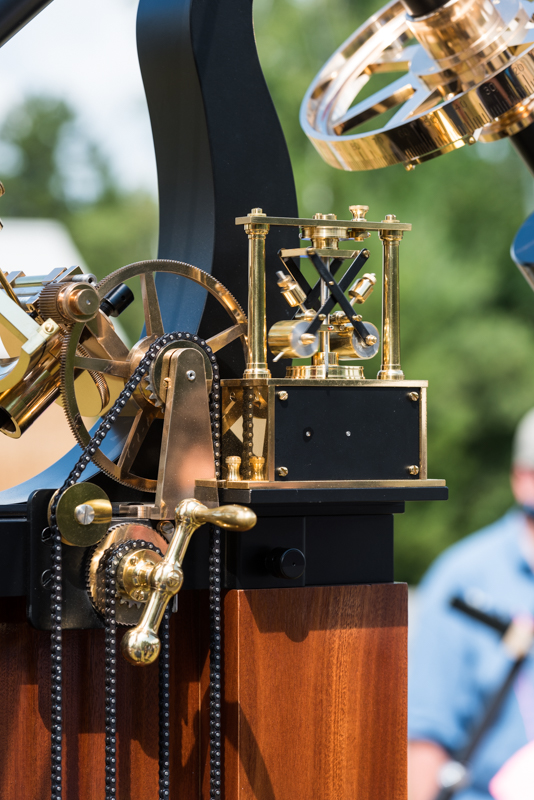
I couldn’t resist taking a couple of close-up shots:

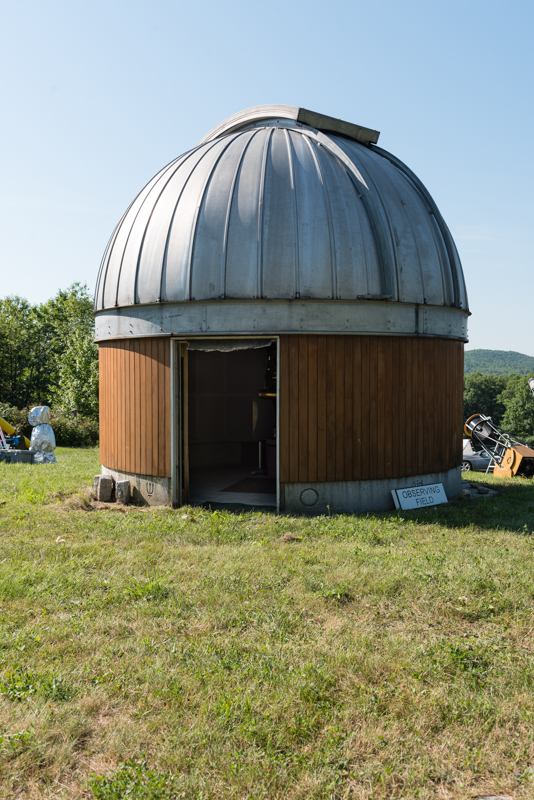
Heading back toward the main site, I walked past the observatory set up in such a way as to be handicap accessible:

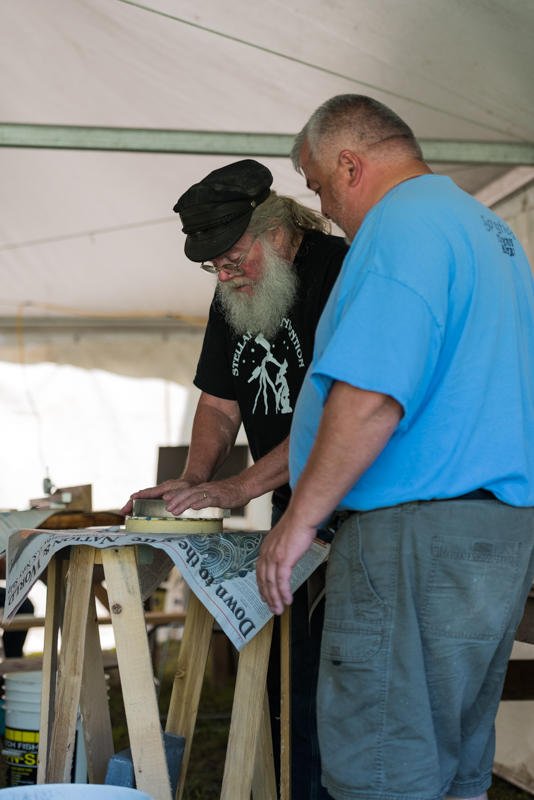
After a breakfast, it was time to go off to the mirror making tent. I think that every year, there is a series of talks and demos about how to make your own telescope mirror.

The speaker letting an attendee give mirror grinding a try:

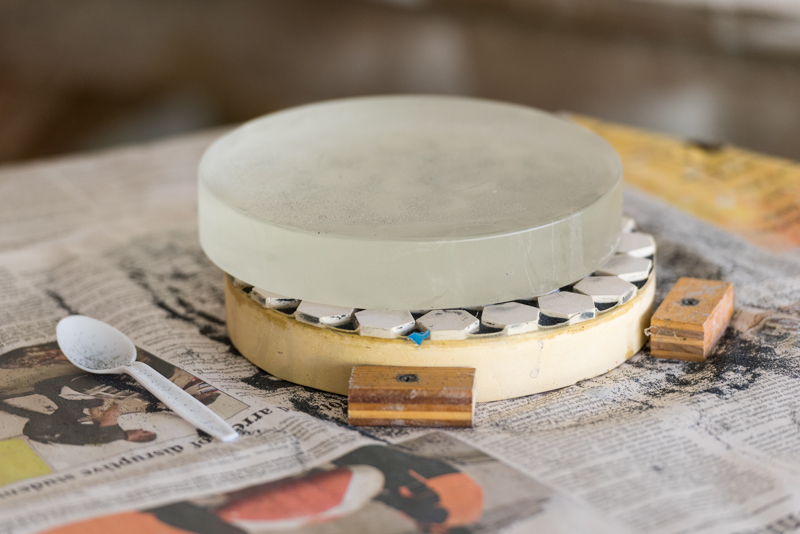
And a close-up of the eventually-to-be-mirror on top of the grinding tool:

Fine grinding demo using a glass grinding tool instead of the plaster one:

After lunch, there was a series of talks about a lot of different topics—ranging from digital imaging, to “crowd-sourced” occultation timing.

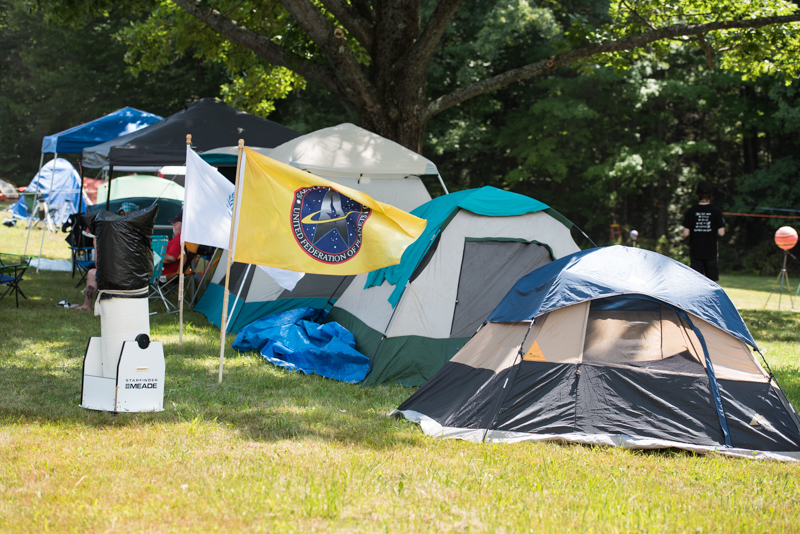
Between talks, I noticed that one of the attendees erected Federation flags in front of his tent:

Once night rolled around, it was time for more observing. I took a number of milky way shots. They all look a bit similar, with the only real difference being what is in the foreground. Of all of them from this night, I think this is my favorite—there were a couple of people standing around a telescope talking with their flashlights on.

Saturday

The second full day of the convention began with mechanical judging of the telescopes.

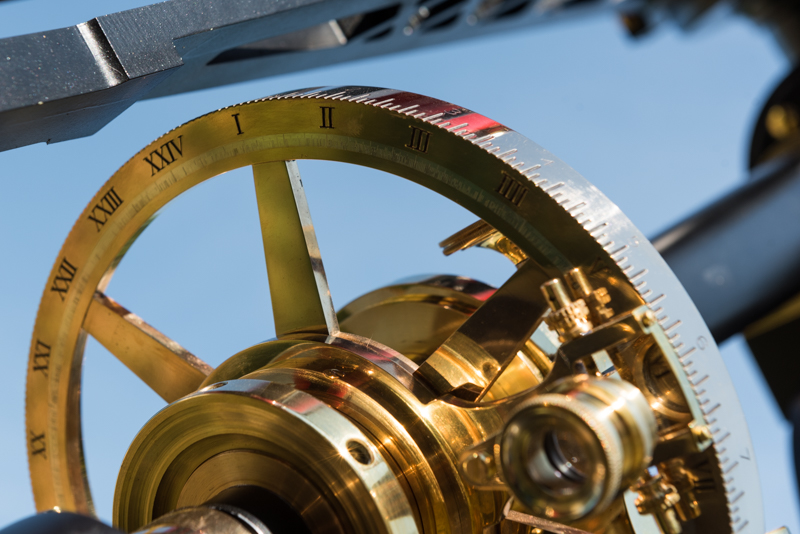
Somehow, I ended up drawn to the twin-scopes; here’s another detail shot. You can see a little bit of motion blur of the governor:

The day program was similar to Friday’s—the mirror making talks and after lunch a set of talks on various topics.

The evening program consisted of the keynote, raffles, competition results, and other customary presentations. The sky was completely covered with clouds till about 1am at which point it started to be conducive to stargazing. Oh well. Two clear nights out of three is pretty good.

Sunday

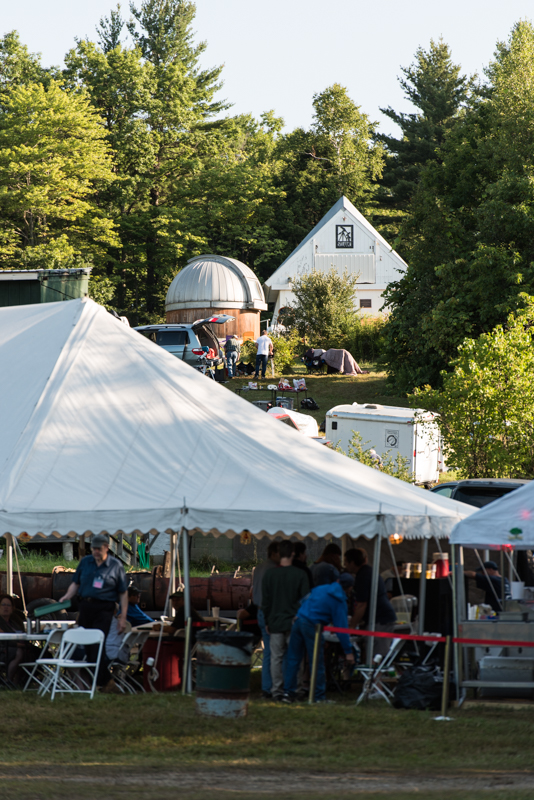
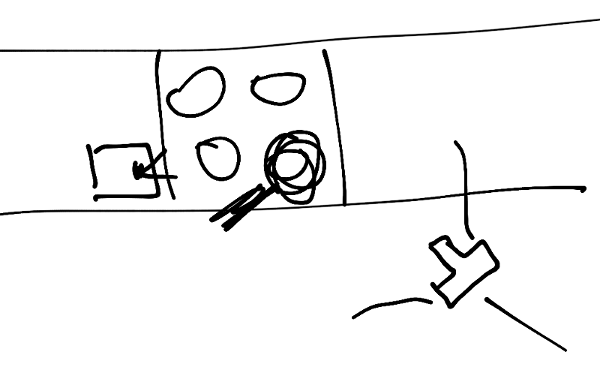
Sunday is all about packing up and heading home. During breakfast time, I ended up walking around a bit and I got this image—with the food tent in the foreground, the handicap accessible observatory near the background, and the McGregor observatory with a Schupmann telescope in the very background.

So, that’s how I spent the last weekend. I’m already plotting and scheming my next astrophotography adventure.

D750 Star Trails

I have tried star trails photography once before—7 years ago. Back then I was using the D70 which was a good camera but there were two problems with it for astrophotography: first, its CCD sensor wasn’t the best at higher ISOs, and second, long exposures were not possible because of some interference (thermal or electric) which resulted in ugly purple fringing. That experience made me not really bother with astrophotography—hence the seven-year hiatus.

A week ago I decided that I should try again with my D750 and the 24-70mm f/2.8 lens. Since they are both significantly newer than my old setup and are superior in just about every way, I thought why not try again and see exactly how much better the results would be.

I ended up with only three shots worth sharing. As always, I made a gallery with them. The one difference from the other photo galleries I make is that I will continue to add star photos to this gallery until the end of the year (when I plan to make a 2017 gallery).

After setting up the camera in the general direction of Polaris, I needed to figure out the exposure. So, I cranked up the ISO to 10000 and took a 5 second test shot at f/2.8. The hope was to see how the sky exposed, and then “trade” the ISO for time to get the same exposure but less noisy and with star trails. (E.g., changing the ISO from 10000 to 160 is 6 stop difference, so the shutter speed needs to change 6 stops in the other direction to compensate. That is from 5 seconds to 320 seconds.) When I viewed the image on the back of the camera, I was blown away:

While there is certainly noise in the image (which you can’t see in the resized version) and the composition is not great, it’s cool how both the foreground and the sky are equally well exposed. The trees are essentially light-painted by the neighbor’s driveway lights which were on at the time. And before you ask, no, that’s not the milky way, that’s just a wispy cloud.

Then, I proceeded to take a back-to-back series of 15 second exposures. After five minutes (21 shots), I was sufficiently bored to try something else. After heading back inside, I stacked the 21 shots using StarStaX. Here is the resulting image (slightly tweaked in Lightroom):

The orange blur on the right of the image is a small cloud that moved across the frame during the five minutes without me noticing. Unfortunately, there is plenty of light pollution to the northeast of us because of the neighboring city of Wikipedia article: Nashua. I am definitely going to experiment with stacking.

The final couple of shots I took were all various long exposures—ranging from 8 to 20 minutes. This is one of the 20 minute exposures:

Again, the light pollution from Nashua is unfortunate.

The 74 degree horizontal field of view at 24mm is pretty good. Of course, a wider lens would provide for an even more interesting shot. For example, a 15mm focal length would produce a 100 degree horizontal field of view. With that said, I am certainly going to experiment more with star trail photography—even if I have “only” a 24mm focal length.

Boston

Two weeks ago I ended up going to Wikipedia article: Boston for a day. I spent my day in three places—the Wikipedia article: Boston Public Library, the Wikipedia article: Massachusetts State House, and the Wikipedia article: Boston Common.

In this post, I will share my photos of anything that did not fit into the other two posts—the post with the Boston Public Library photos and the post with the Massachusetts State House. (All three posts share the same gallery.)

This is a view of the eastern end of Boston Common. There was a window at the State House that offered a good view, so I snapped it.

The weather was quite nice—low 20°C, sunny, light breeze—and so the Common was full of people enjoying the day. Both passively:

and actively:

Industry by Wikipedia article: Adio diBiccari:

Heading back toward Copley Square and the Boston Public Library, we encounter the John Hancock tower:

At this point, it was time to start heading back to Harvard where I left my car. I noticed an interesting ad at the bus stop right by the library. It had three panels filled with water and bubbles. I realize it isn’t the sharpest photo.

When I got off the red line at Harvard, I tried some long exposures of the trains. It turns out that unless the trains are packed, they keep their doors open for only about 10 seconds. In this 13 second exposure, you can see that the door was closed for a part of it.

An 8 second exposure worked quite well. (Unfortunately, I like the first composition better.)

So, this concludes the three post series about my one day excursion to Boston. I certainly learned a couple of things about photography in the 401 shots I took. First of all, tripods are amazingly useful indoors. Second, anyone can take a shot of a subject—it takes the “know what you’re doing” to consistently get an image that is not just good but better than average. Third, I need to read up on architecture photography before my next excursion so I know what I am doing. :)

Massachusetts State House

Two weeks ago I ended up going to Wikipedia article: Boston for a day. I spent my day in three places—the Wikipedia article: Boston Public Library, the Wikipedia article: Massachusetts State House, and the Wikipedia article: Boston Common.

In this post, I will share my photos of the Massachusetts State House. I have a separate post with the Boston Public Library photos and another post with the Boston Common and other places around Boston. (All three posts share the same gallery.)

The State House with its (real) gold covered dome:

Nurses Hall (24 MB panorama):

One of the entrances into the Senate room:

And its interior (32 MB panorama):

The Great Hall of Flags. It used to be a courtyard until 1990 when they put a glass roof over it and turned it into an event space. The flags supposedly act as echo dampeners. These are the flags of the various towns in Massachusetts.

The building is filled with doors—some fancy and some rather plain:

Finally, in the very back, there is a pretty nifty staircase:

Unsurprisingly, much like at the library, I had to bump the ISO pretty high to get an acceptable shutter speed with a large enough depth of field. A tripod (or even a monopod) would have helped quite a bit. I guess I know what’s getting a higher priority on my photo gear shopping list. Additionally, I should read up on architecture photography before the next major trip.

Boston Public Library

Two weeks ago I ended up going to Wikipedia article: Boston for a day. I spent my day in three places—the Wikipedia article: Boston Public Library, the Wikipedia article: Massachusetts State House, and the Wikipedia article: Boston Common.

In this post, I will share my photos of and around the Boston Public Library. I have a separate post with the State House photos and another post with the Boston Common and other places around Boston. (All three posts share the same gallery.)

The front entrance to the library:

A 180° view of the front of the building (32 MB panorama):

A peek into the reading room—Bates Hall:

Bates Hall in all its glory:

The library has a courtyard with a water fountain. The tower in the background is the tower of the neighboring Wikipedia article: Old South Church.

A close-up of a card catalog.

There are actually two churches right next to the library. Right across the street from the main entrance is the Wikipedia article: Trinity Church.

The other is the aforementioned Old South Church on the north side of the library. Toward the end of the day, it ended up backlit creating a neat silhouette.

This was really the first time I actively tried architecture photography. Shooting indoors around f/8 without a tripod was not the best thing for image quality. To keep the shutter speed in a reasonable range, I had to bump up the ISO resulting in a bit of noise. I will know what to expect next time I try this.

Memorial Day (2016)

Wikipedia article: Dunstable has an annual Memorial Day parade. Since Dunstable isn’t a very big town, the parade is not very big, but it is still nice to go to and enjoy the small-town atmosphere. This year was very overcast which made for really boring skies. As a result, I ended up with only eleven shots worth sharing. You can see all of them and the metadata in the full gallery.

The crowd begins to gather in front of the town hall (a 7-shot panorama):

The parade proceeding to the town hall:

Some cars and trucks were part of the parade. There was an old school military jeep, some sort of big military truck, as well as the Dunstable fire department’s truck.

A closeup of the military truck’s winch and grill:

The fire department’s truck:

The parade stopped in front of the town hall for a couple of speeches and placing of wreaths at the war memorial right on the lawn.

After about 20 minutes, the ceremonies concluded with a salvo from the reenactors. I got lucky and even though I wasn’t anywhere near them, I managed to capture the moment. (I was on the other side of the lawn from them and I only had the 24–70mm f/2.8 lens. This is why the foreground is a bit cluttered with the flag pole and the memorial itself.) Apparently, the folks in the foreground did not expect a loud boom.

A crop showing just the interesting part. I like how the different guns are at different stages of firing.

Technically, the parade moved on to the Central Cemetery, but I had errands to run so I left.

Battle Road Trail Walk

Last weekend Holly and I braved the 35°C weather, and drove to the Minute Man National Historical Park for their Battle Road Trail Walk—a three and a half hour walk covering almost 7 km of the Battle Road trail.

Naturally, I brought my camera. Unfortunately, because of the terrible heat, I didn’t take all that many photos. Of the ones I did take, I think only five are worth sharing. I am including them all in this post, but you can check out the gallery for the photo metadata.

The walk began at Meriam’s Corner, where on April 19, 1775 the locals attacked the British column returning from Concord and drove them all the way back to Boston. This is the beginning of “Battle Road”.

This is Nathan Meriam’s house—standing right next to where the attack began.

Despite the heat, we were only two of about 35! We were shocked to see that most people decided to show up to a 7 km walk in 35°C heat with barely 500 ml of water per person. (We knew better and brought a little over 4 liters for the two of us. And we had a stash of sports drinks in the car.) We were surprised nobody passed out along the way…or at least we did not notice anyone passing out :)

Here is park ranger Jim Hollister, our guide for the walk, mid-sentence near Hardy’s Hill. (I know, not the most flattering of photos.)

Hartwell Tavern is a little past the half-way point of the walk. The whole group took a break here so I had a few minutes to kill—and I did that with photography!

First of all, the tavern itself:

And an 8-shot panorama of the tavern and some of the walk participants. (38 MB full size panorama)

And the last photo from the trip is the Captain William Smith house (in Wikipedia article: Lincoln, MA).

As I said earlier, I did not take that many photos. I will try to do better in the future. :)

Powered by blahgd